Friday, December 31, 2010

Trophy!

In my previous post, mantioning the first annual Andrew Price Tutorial competition, I forgot to mention one thing: the prizes! So here they are...

1st (first) prize winner will recieve this awesome trophy:
And an (un) official Suzanne trading card.

2nd (second) prize winner will recieve a silver trophy and the Suzanne card.

3rd (third) prize winner will recieve a bronze trophy and the Suzanne card.

Wednesday, December 29, 2010

The First APT Competition! December 29-January 7

Before I reveal what "APT" means, here's a tacky intro:


          His name is a legend...
                                                    ...among Blender geeks...


...His tutorials are known across the globe...
                                               ...he is known as the Blender Guru...


                               He is...

Andrew Price.
     Andrew Price's Blender tutorials are known around the Blender Community as being very instructive and fun, and he has spoken at the annual Blender confrence. He writes tutorials and gives out free downloads at http://www.blenderguru.com/.

     So I decided to host an annual Andrew Price tutorial competition. you must build a scene in Blender using only things that you learnded from an Andrew Price tutorial. Here are the official rules:

1.You are only allowed to use things that you learned in an Andrew Price tutorial. You may look for tutorials while making your scene and read them. There is no limit to the amount of tutorials you can use. However, you may not use the starter files that Andrew sometimes gives out before his tutorials.

2.You may use any version of Blender that you like, even if it's not the one the tutorials are about.

3.You may make your scene a still image, an animation, or a game. You will then post the link on this blog. Everyone who follows this blog may participate. I will then put a poll with everyone's names on it who entered, and everyone can vote for who made the best scene.You may not vote for yourself.

                                                                That is all. Carry on.

Saturday, December 25, 2010

Hey, everyone! I just got a minute card for Pxmas, so I can talk to you whenever I have my phone! Aren't you soooo happy?

Wednesday, December 22, 2010

How to Make a Delicious Frappe in Blender 2.5: Part two

Hey, everybody! In the last part of this tutorial, we made a cup, gave it proper lighting, and made it see-through. In this part, we're going to work some more on that.

1.With your cup selected, Shift+D duplicate it, then hit enter to stop the grabbing motion. Then scale the duplicate down a bit so that none of it is outside of the original cup. Then go to the materials panel and click on the minus sign to get rid of the cup's material. Then click "New." Name your new material "FrappeBrown," and give it a brownish diffuse color. Then go to the Textures panel and click "New." Name your new texture "FrappeTex," and change the texture type from "Clouds" to "Noise." Then at the bottom of the textures panel, under "influence," select RGB to intensity, select "Normal," (the first box under the Geometry heading), then under the RGB to intensity button, make the color white. Render it. Your cup and frappe should look something like this:

2.With the cup selected, hit Shift+S, then from there, click on "Cursor to Selected." Then add a sphere. Then hit G>Z>4, then S>2.6. Then tab to edit mode, and select the bottom half of your sphere. Hit X, then click on "Faces." Then hit G>-Z>2. Then tab back to object mode. Click on "Smooth" in the shading panel. Then add a new material and name it "Whip." Add a new texture and name it "WhipTex." Change the TextureType from "Clouds" to "Wood." Then change the wood-type to "Band Noise." Then under the "Influence" heading, make the color brown, and select "Normal."

3.Go to sculpt mode. Use the grab tool to make the white lump on the top of your frappe look more like whipped cream (which it, in reality, is meant to be).

Here's the result of my whipped cream sculpting
4.With the 3D cursor still at the center of your cup, add a tube. De-select the "Cap ends" option in the "add tube" panel at the left side of the screen. Go into wireframe mode (Z) and scale it down a bit. Then tab to edit mode and de-select everything. Select all the topmost vertices, then hit E>Z>5. (Again, if your extrusion is already locked on the Z axis, don't press Z after the E.) Then hit G>-Z>3. Tab to object mode and rotate and translate it so that it's sticking out of the cup and through the whipped cream at an angle.

5.Add a new material to the straw and name it "Straw," then add a new texture to the tube and name it "StrawTex." Make the TextureType a Blend, then under the "Colors" header, click on "Ramp." Select the right-most vertical line and change its location (the spinner under the ramp) to .496, and make the color red. Then select the left-most line and set its location to .223, and make it white. Put its alpha all the way up. Then click "Add," and change the location of the new line to .230, and make it white with its alpha all the way up. You should have a white background with a red line down the middle in the preview window.

6.Grab all the objects (including the lamp) in the 3D window, and hit G>-Z>4. Then save your work and render it. Congradulations, you have just made a frappe on Blender!

Donnel House

Hey, everyone! I just spent the last week helping out my dad (who is James L. Nelson) decorate and un-decorate the Donnel House, a Victorian mansion, property of the Maine Maritime Museum. (Since you already know who my dad is, why not give away my age, too?) Anyways, it looked pretty cool, and my sister looked pretty good dressed up like Addie Donnel, who is still in the house, even though she's been dead for decades.

Tuesday, December 21, 2010

How to Make a Delicious Soft Drink in Blender 2.5: Part One

Sorry, Hester, but there was something wrong with Blender 2.4 on my computer, so I can't do the tree tutorial quite yet. But in the meantime, here's a 2.5 tutorial.

The final render result of this tutorial
1.Start with the default screen of Blender 2.5. Delete the default cube and add a circle. Click on "fill" in the "add circle" panel on the left. Then tab to edit mode, and extrude the circle (E>1). Then tab back to object mode and scale it (S>X>shift+Z>2). Then go back to edit mode. All the topmost vertices will probably be selected. If they're not, de-select everything and select them. Then hit E>S>X>shift+Z>1.3. Then hit E>5. When you hit E, your extrusion should already be locked onto the Z axis. If it is, you should see a blue line through your mesh. If it isn't, then you won't see anything. In that case, press Z after you press E. With the topmost vertices still selected, press X or Delete, then choose "faces" from the menu that pops up. Then select the topmost vertices and hit E>S>1.1.

2.Back in object mode, click on "smooth" in the sading panel. Then go to the checkerboard circle (the materials panel) and... wait! If I were anyone else, I'd tell you to add a new material. But don't. If you click on the checkerboard circle (browse ID data), you'll see that Blender comes with a material named "material" by default. I'm big on not having extra materials and textures, so select the default material. And if there isn't one, add one. Name it "CupTransp." Go down and select the box next to the word "tranparency." Then open that panel, and change the type of transparancy to RayTrace. Turn the fresnel up to "2.5."

3.Then go to the Textures panel and click on the Browse ID Data button (the checkerboard square) and click on "Tex." If there isn't a default texture already, add a new one. Name your texture "CupTex." Change the texture type to "Blend." Then change the Blend to "Diagonal." Then scroll down and change the color of the texture from pink to gray.

4.Next, select the default lamp and hit G>-Y>3, then G>Z>4. Then go to the lamp panels and change it to a hemi, and give it a slightly yellow color. Change the energy level up to 1.450. Now for rigging the camera. Select your cup, then tab to edit mode. Now, this step has to be done in edit mode. Select all the vertices with either Ctrl+L or A. Then hit G>-Z>3. Then tab back to object mode and do the same agian, but on the positive-Z axis. That has just moved the object center (the orange dot) to the actual center of the cup. Slect the camera, the Shift+select the cup. Hit Ctrl+T, then click on "Damped track to constraint." Then go to top view and select only the camera, then hit G>X>5, and G>-Y>5. Then G>Z>6. Then render your cup with F12.
The result should look something like this.

Thursday, December 16, 2010

Ben...

Here are my failed renders from your donut tutorial:

This is the one that turned out like a powdered donut....


And here's the one the turned out kind of okay. But the problem is that the material somehow is sideways instead of right-side-up. Maybe I'll try the tutorial again and pay more attention.

Wednesday, December 15, 2010

Hey!

Any of you want to hear an incredibly lame tutorial? Great. Just give me something to write one on.

Wednesday, December 1, 2010

Hey!

Have any of you ever heard of famous maritime author James L. Nelson? Just wondering. 'Cause his historical nonfiction is awesome, and his historical fiction is even better. Some of his books include The Guardship, The Blackbirder, and The Pirate Round. Just thought you might want to check it out. That is, if you like history.

Wednesday, November 17, 2010

Hi!

I'm posting from one of my favorite places in the world: the library! I'm such a regular here that all the librarians know my name. Is that awesome or what?

New follower!

Let's all welcome Neil Wells, my second follower who I didn't beg to follow me.

(How lame is that?)

Saturday, November 13, 2010

My FReD!

FReD stands for FiRst RenDering. This is my first animation render to a format that I can post on my blog.


Now I can check off "Post a rendered animation on Blogspot" on my "List of things to do before I turn, um, my next age."

Monday, November 8, 2010

Tuesday, November 2, 2010

1st Blender Tutorial!

Uh, remember how I said I got a Vimeo account? Well, here's the link to my first video....


                                                  http://vimeo.com/16447351

Tuesday, October 26, 2010

Vimeo!

Y'know, from my experiance, people who love and use Blender don't seem to use YouTube that much, but Vimeo instead. So I made a Vimeo account.

Monday, October 25, 2010

PotES

Hey, remember hen I gave you a sneak peek of my animation, PotES on the town? Well, I've kind of given up on this, but here's a render from it using my first mirror effect:

Like it?

P.S. PotES stands for Penguins of the Empire State.

Saturday, October 23, 2010

iPod

I just figured out how to download YouTube videos onto my iPod using KeepVid.com http://keepvid.com/?url=http%3A%2F%2Fwww.youtube.com%2Fwatch%3Fv%3DbsGEWHNJ3s8, and as we speak I'm downloading Elephants Dream! It wouldn't let me get Sintel, though, so I don't know if I can get E D or Big Buck Bunny.

Wednesday, October 20, 2010

How to Make & Edit Text in Blender

Hello everyone. This is Natron1, with my second, or maybe fifth, tutorial. My first one had four parts and was about programing a game in Blender.


1.Open up Blender 2.5 Beta 4, a.k.a. Blender 2.54. Delete the default cube. Go to the Add menu (Shift-A) and click on "Text." On the left-hand side of the screen, click on "Align to view." That'll make the text face you.

2.As you can see, the text says only "Text." We'll fix that later. First, go to the Text Panel in the list of properties on the right side of the screen. Its icon is the letter "F." Go down on the Text Menu and you'll see the word "Geometry." Under it, you'll see three sliders. if you increase the top, left-hand slider, your text will become a jumbled mass of shapes. If you decrease the slider, your text will become a negative jumbled mass of shapes and look like a Picasso.

3.Undo your last move so that your text looks normal. Then increase the slider next to the one you previously used. Your text will, once again, become a jumbled mass of shapes. But this time it's organized.

4.Undo your last move and focus your attention to the top, left-hand slider. This is, by far, the coolest. If you increase it, your text will be scaled on the Y axis, or whichever one it's facing.

5.Here comes the cool part. Tab to Edit Mode. A cursor will appear at the end of your text. You can now Backspace or Delete the word, and write whatever you want to write!

This concludes my second tutorial. See you later!

Thursday, October 14, 2010

A review of computer programs

My first real-favorite computer program: MILSBERRY. It was okay, for a bad-grade, boring MMOG, but the advertising! Whew! http://www.millsberry.com/


The next was Lego.com. I was obsessed with Legos, and I still like them.http://www.lego.com/en-us/Default.aspx


Teh next was kind of an upgrade from MILSBERRY. It was Club Penguin, which my sister finally convinced me I was too old for. http://play.clubpenguin.com/


Then there was Ninja Turtles.com. I really liked the TMNT TV show and the comic books. http://www.ninjaturtles.com/


Then, of course, Anime Studio Debut. This is a 2-D animating software that my grandfather gave me. It's okay, but not as good as...


Blender! When my dad took me to see a professional animator, he reccommended that I start my career on Blender. At teh time, I was like, "Who's gonna name their program Blender?" Of course, I got to love it. http://www.blender.org/


Here we must mention Pencil, another great animating software that you can download from teh internet at http://sourceforge.net/projects/pencil-planner/files/Pencil/pencil-0.4.4b-win.zip


Then comes the last program I have found so far: GameMaker. It's seriously awesome. It's like Blender Game Engine, but it's, like, Mario-style!http://www.yoyogames.com/gamemaker/

Tuesday, October 12, 2010

Tuesday, October 5, 2010

Sneak Peek!

This is a sneak peek at my upcoming animation, The PotES on the Town.

Are you excited? !:)

'Tis the season!

When my family and I got back from the Southwest, we noticed something very differant about where we lived. It was Fall! Time for turkeys and ghosts and all that stuff! So I made this quick rendering to celebrate:

Like it? (Please comment!) !:)

Saturday, October 2, 2010

Huh.

I see tha that Plrang has un-followed my blog. I guess we'll never know who he was....

Thursday, September 30, 2010

New Blog!

I just created a blog that was meant to be a forum for all of my followers except Plrang, Pixar (who's now DS-DNA,) and my aunt who couldn't care less about Blender. I made a page for each of you with your names as the titles. (Well, your blogger names, not your real ones.) Should you accept my offer to join my forum, then you will comment on this post, telling me your email address. If you have a junk or spam one, that would be better, so you won't think I'm like, an evil person or something. The address of the blog is http://blendertheforum.blogspot.com/. See you there!

I'm Back!

Hi, everyone! I'm back home. We flew in from Pheonix, Arizona, last night. Well, technically, yesterday morning. But we got home around 8:30.

Tuesday, September 28, 2010

I've Got an Idea.

I have three blogs. But my aunt suggested that I delete my cartooning and writing ones, and make this blog all three (the third one is animating). What do you think of that?

Tie!

The poll for "Best Version of Blender" goes to...a tie between Blender 2.49b, and 2.5 Beta 3! (But 2.5 Beta 4 wasn't out yet. Comment if you think that's better than the other two.

New Followers!

I would like to welcome two new followers to my blog, Artturi Mäntysaari, and my aunt Liz. By the way, a note to Artturi Mäntysaari: If you comment on this post and tell me the address of your blog, if you have one, then I'll see about following it. Thanks!

                                                                                                   -Nate

Thursday, September 23, 2010

Blender 2.5 Beta 4!

Blender 2.5 Beta 4 is here! I'm downloading it on my sister's laptop as we speak! (Remember I'm still in Arizona, and don't have access to a real computer.

Monday, September 20, 2010

Like my new template?

NN (Nate Note): Um, I just wrote the entire post in the title, so, uh, yeah...

Listen.

I would like to know who Pixar and Plrang are. I don't want to have people following my blog who don't tell me where to find their blogs.  If Plrang gets this, I'd like him/her to change his/her profile picture from the disturbing current one. And if Pixar gets this, I'd like him/her to inform me if they have anything to do with and/or is associated with the Disney/Pixar movie company.

Friday, September 17, 2010

Hi. I don't know if the text I just sent from my sister's phone got through or not, so I'm texting just because.

Wednesday, September 15, 2010

-already used to the Z, Y, and X Axises! (Snicker!)
Sorry if it takes me awhile to comment on your blogs again, because I'm in Colorado and it's incedibly hard to get to my sister's laptop.

Sunday, September 12, 2010

? n invited y'all to be able to post on it, and we could use it as our kind of message-board. How's that sound?
? Hi. I'm posting from my phone cause my sister's using her laptop. Hey! I had an idea the other day: what if I started a blog the

Thursday, September 9, 2010

Crad!

Sorry. I posted that from my phone, and I guess I kind of failed. And I  don't owe anyone anything; the follower I had forgotten was my aunt.
? morized his followers. Fail! PS, if Pixar is a good person, he'll at least tell me how he found this blog!
? er, Pixar (I still don't know who he is) and, um, oh no! I can't remember my sixth! Or even if I had one! I'm such a bad blogger. A real nerd would've me
? Yo! I'm very happy that I figured out how to post from my phone! And I would like to thank my awesome followers: Ben, Meshweaver, Plrang (3d human), Hest

Guess what!

I just attached this blog to my cell phone so I can post on it from the road, as long as I have units left on my phone. The last  two posts were from my phone, and, (guess what) it blew my dad's mind.
Hi again.
Yo! Just seeing if i can do this.

You know what's weird?

The name of this blog. It's like, "...For the Aspiring Young Animator," but all of my followers are quite likely much older than me.

Hi!

It's me (duh). I'm sitting in the living room of my family's hotel room in the Hospitality Suites in Pheonix, Arizona. I'm posting from my sister's laptop. I might be able to post more after this, but I don't know. She wants her computer back, but I don't know why. Maybe it's because she's stuck watching old John Wayne movies on the hotel room's TV.

Monday, September 6, 2010

See ya!

My immediate family and Iare going out to the Southwest for three weeks. We're going to Vegas, Four Corners, the Grand Canyon...and all those other awesome places. So, this is probably the last time I'll be able to post until I get back. So-see ya!


-Natron

Thursday, August 26, 2010

I'm so proud of myself!

I got one of my friends who I don't see very often into Blender! He told me he had tried to make some video games before. He must be pretty talented to do that without Blender! Anyways, I got a call from him today, asking about a few things. Maybe he had trouble with the installation. We all know that Blender installs like no other program, right? Of course right.

Thanks, dude.

Thanks, Meshweaver. That really helps, what you told me about resizing embedded videos!

Your friend,
Natron.

Wednesday, August 25, 2010

Hi.

Since I don't know how to make my video panels smaller, I'm just writing this post so that my poll will be uncovered. I want people to be able to see it, y'know?

Tuesday, August 24, 2010

Big Buck Bunny!

Anyone who loves Blender has probably already seen this, but I just figured out how to embed YouTube videos on my blog, and this felt appropriate.... JSYK, this was made completely by proffessionals on Blender 2.46!

Monday, August 23, 2010

HELP!!!!!!!!!

I'm trying to download Pencil, the animating software that that Matt guy who runs Bloboshpere talked about, but I can't! It's way too confusing!!!

Friday, August 20, 2010

Sorry about that.

I didn't get all of the versions in the first poll, so I guess you'll just have to vote again. You can get a description of all of them at http://www.blender3darchitect.com/2010/01/remember-the-past-from-blender-1-60-to-2-50/. That is all. Carry on.

Tee-Vee: Part One: the Characters


                                                    This is Tee-Vee. Sorry about the Widges.


These red guys are Pixels. Tee-Vee's trying to save the world from the MotherBoard, who's a giant computer. She sends all sorts of computer-stuff at him. you can dispense of them with Tee-Vee's magical blue sword.


This is a Megabyte. These guys are too powerful to disappear when they touch your sword. You have to lure them into the water-it's they're only weakness.


These green sphere-guys are Gigabytes. They're the big brothers to Megabytes and Pixels. But we know their one weakness: hubris.They're too over-confidant. They'll jump on top of your head, hoping to suck out all your power. But quick, before they do, carry them over to the big Ruby over there! Touch them to it and they'll dissapear!

Thursday, August 19, 2010

Going through history...

Okay. Since I'm posting on my sister's laptop, and she's got 2.46, here's the start-up screen for it:


                   This is the start-up screen for Blender 2.49b. If you press a key or move your mouse the slightest bit, the thing with the weird orange alien guy would dissapear.


                            This is the start-up screen for Blender 2.5 Alpha-2. You can see all of my files up there. Game Engine Tutorial 3...Sundial CIty...Gravity Guy...


                         This is the screen for Blender 2.5 Beta-3. The newest-and so far awesomest-version of Blender. And I thank Ben for showing me how to do screenshots.

CRAD!!!!!!!!!!!!

I accidentally followed my own blog...! ...is that even legal?

Thursday, August 12, 2010

Blender Game Engine Tutorial: Part Four

In the last three tutorials, Nate Nelson Blender Game Engine Numbers One-Three, you made a Cube-guy, gave him some texture, made a ground, a background, and an enemy. This is my rendered enemy.

NOTE: To make him checkerboard, Make the first color red, then the second one white. Go to the textures panel and click 'Nodes.'

Now. In this tutorial you will learn how to make your enemy track you, and how to defeat him and make your game first-person.

1.First, go to top view with NumPad 7. Select your Enemy with the Right Mouse Button. Then hit NumPad Delete. Make sure you hit the one on the NumPad, otherwise you will have just killed your Enemy without raising a weapon.

NOTE: In all these tutorials, Number Lock (In the top, left-hand corner of the NumPad) MUST BE SELECTED! On most keyboards, a light will go on when Number Lock is on.

2.Now, with your Enemy selected, go to the Logic Editor panel (F4). Click on Add, Add, and Add. Connect the three, of course. Then change the 'Always' in the Sensor panel to a 'Near.' Then click on 'Property,' then type in 'Cube.' Make the 'Distance' to twenty (20.00). In the Actuators panel, make the middle button on the Loc row zero, point zero-five (0.05.)

3.Go back to your Cube-guy, and add a cylinder. Use the Widges to rotate and move it until it's sticking out of the front of your Cube-guy.


This is my Cube-guy with his sword sticking out of the front of him. Scale down the cylinder and switch to the scaling Widges by clicking on the blue square next to the green circle and the red triangle which is next to the pointing-hand icon that activates the Widges. Select the sword. You can give it a color and texture, if you want. Or you can press F9 to go to the editing panel, then press 'Set Smooth.'

4.Now, with your sword selected, go to Logic Editor (F4) and click on 'Add Property.' Name the property 'Sword,' with a capital S.

5.Select your Enemy again, then add another thing under the Actuators panel. Click on the word 'Motion.' A menu should appear. Select 'Edit Object.' Under that, click on 'Add Object.' A menu should appear again. What's with all these menus? Select 'Track To,' then click on OB: and type in 'Cube.' Then attach your Controller to the second Actuator. Good. Now, add three more things: one Sensor, one Controller, and one Actuator. Connect them. In the Sensor, change the 'Always' to a 'Collision.' Click on 'Property,' and type in 'Sword.' Then, in the Actuator panel, change the 'Motion' to an 'Edit Object,' then under that, change the 'Add Object' to an 'End Object.'

Good! Now you can press P with your mouse over the 3D view. Make sure you can see the entire ground, so you know when you're going to fall off. Your Enemy should track your Cube-guy now. If you touch him with your sword, he will disappear. Press Escape to exit Game Mode.

6.Now we've still got some work to do. Select your sword, then go to the Logic Editor panel (and I don't need to tell you that to get there you press F4). Add a Sensor, a Controller, and an Actuator. Connect them. In the Sensor panel, change the 'Always' to a 'Keyboard.' Click on 'Key,' then press the spacebar. In the Actuator panel, change the third button in the Loc row to negative zero, point zero one (-0.01.) Now add another Sensor, Controller, and Actuator. Connect them. Change the 'Always' to a 'Keyboard.' Make the key Left Shift. Then, in the Actuator panel, make the last button of the Loc row positive zero, point zero-one (0.01). Then use the Y (green) Widge to make it so that the sword is completely inside your Cube-guy. Now, when you press P, you'll be able to move with the arrow keys, and display and retract your sword with Spacebar and Left Shift.

7.The Penultimate part of the tutorial is cloning your bad guy. Select him, then hit Shift-D. Move the clones around with the Widges. They'll all try to kill you, but you can vanquish them all!

8.The last step is to make the game either first or third person. If you're going to do first person, then select the camera, and move so it's right in front of the Cube-guy. Then Shift-select your Cube-guy and hit CTRL-P. Select 'Make Parent.' Good.

NOTE: I'm sorry. The sword should be next to the Cube-guy, instead of in him. And the camera should be a little farther forward than him. Sorry. And you should make the camera and sword both actors, dynamic.

9.If you want to make your game third-person, just do the same thing I told you to do, but put the camera kind of looking over his shoulder.

Well, this just about wraps up the fourth Nate Nelson BGE Tutorial. Have fun on your game, and I'll see you next time!

Blender Game Engine Tutorial: Part Three

Hi! It's me again. Ready for another Nate Nelson Blender Game Engine Tutorial? No? Hm...All those in favor, raise their subsurfed cylinders on the Z Axis, all those opposed...

Just kidding. Last time we made a ground, sky, and lighting, not to mention tracking to constraint the cameras to our Cube. This time, we'll make our Cube move in Game Mode with the arrow keys, and start making an enemy we can fight. So, everyone, START YOUR GAME ENGINES!!!!

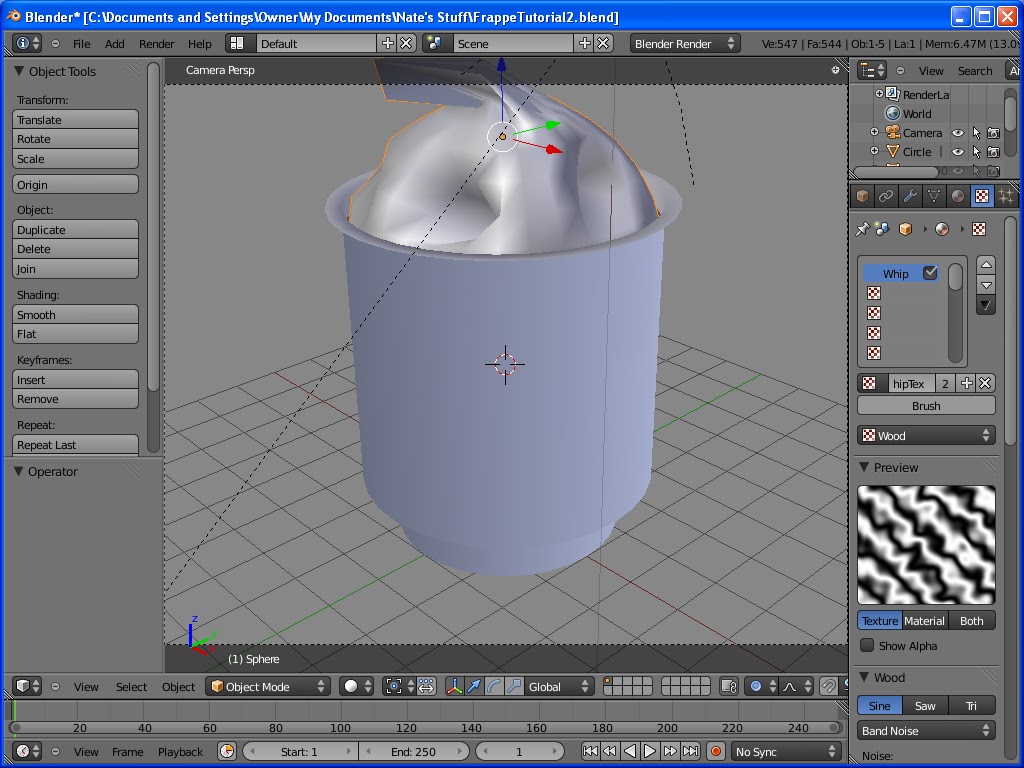
By The Way, that was what my rendered image looks like. Yours should look something like this, unless, of course, you used different colors or textures.
1.To start, we'll have to make our Cube an actor. To do this, go to the Logic Editor panel by pressing F4. Under the word 'Panels' is a pink strip of buttons. Select 'Actor,' then click on the word 'Static,' which should be to the far left of the pink strip. a menu should appear. Click on 'Dynamic.' This will make your Cube's will bend under the mighty power of...

2.Gravity. You can test this force by bringing your Cube about 6 Blender untis upwards on the Z Axis. Either use the blue Widge or press 'G,' then 'Z,' then '6.' Then press Numpad zero to go to camera view, then 'P' to start the game. Your Cube should fall onto the ground you made. Press Escape to exit Game Mode. Your cube is still in the air. Do put it back, use the blue Widge or press 'G,' '-Z,' then '6.' Make sure that you press the hyphen key (-) before the Z, or your Cube will go up, instead of down. When it goes down six Blender units, click the Left Mouse Button or hit Escape to exit Grab Mode.


3.Now we're ready to make your Cube move. Select him with the Right Mouse Button, then press F4 to go to the Logic Editors panel. You will see three bluish-greenish buttons that each say 'Cube.' Beside them are three buttons that each say 'Add.' Click all three of the Add buttons.

4.Under the first 'Cube' button is an option that says 'Always.' Click on it. A new menu will appear. Select 'Keyboard.' The menu should extend into a purple one that says 'Key,' 'Hold,' 'All Keys,' 'LogToggle,' and 'Target.' No, this does not mean the department store. Click on 'Key.' The button will be selected, and the words 'Press a Key' will appear. Hit the up arrow on your keyboard.

NOTE: When I say the up arrow on your keyboard, I do NOT mean on your NumPad. I mean the four buttons with arrows on them next to the NumPad.

5.Now Track to Constraint your eyeballs over to the third and last panel. BTW, these three are called the Sensor, the Controller, and the Actuator panels. Notice that under 'Simple Motion' there are six rows of buttons, the top one being 'Loc.' This stands for 'Location.' See that all three of the options are at 0.00. Use the left-facing arrow on the middle button to move the number down to negetive zero, point ten (-0.10).

6.Now, if you press 'P' to go to Game Mode...nothing will happen. That's because you have to physically connect the Sensor, Controller, and Actuator panels. Notice that there's a gold sphere on the right side of the Sensor and Controller panels. Click and hold on the sphere to the right of the Sensor panel, and drag the mouse to the gold circle to the left of the Controller panel. When your mouse is hovering over the circle, let the Left Mouse Button go. Repeat that process to connect the Controller panel to the Actuator panel.

7. Good job! Now, if you press 'P' to go to Game Mode, and press the up arrow, your guy will move forward. Now we're going to do the same thing all over again. Press Add, Add, and Add. if you want to make this big so it's easier to see everything, put your mouse over the S, C, and A panels, hold down CTRL, and press the down arrow key. This will maximize the window. So now that you have added three more, uh, things, connect them like before, and change the 'Always' to a 'Keyboard.' Click on 'Key' and press the right arrow. Go over to your new Actuators panel and, on the 'Rot' (which stands for Rotate) row, make the last number negetive zero, point ten

(-0.10). This makes the guy rotate to the right.

8.Now add three more things (sorry I don't know the actual word for them). Repeat what you've done before. The Keyboard, pressing the Key button then the left arrow key, then attaching them. This time do the same thing in the Actuator panel, but make the Rotation positive zero, point ten (0.10), not negetive zero, point ten.

9.Good. Now all we have to do is add another three things. Attach them. Set the Key to 'down arrow key.' Then, on the 'Loc' row, make the middle one zero, point ten (0.10). After you've done that, press CTRL-down arrow to minimize the panels menu. Then press 'P' to start your game. Move your guy around with the arrow keys. Congradulations! You have made your Cube-guy move!


10.Press Escape to exit Game Mode. Now, with your mouse over the 3D view, switch to top view with NumPad 7. Scroll out until you can see all around the ground. then select the ground with the Right Mouse Button. Hit Shift, then the 'D' key. Hit Escape to exit grab mode. Then use the green Widge to move it forward. Repeat this process using the Y and X (green and red) until you have eight duplictes on every side of the original. this way, you won't fall off the edge so easily.

11.Add another cube with Shift-A. If you remember how to make a new color, do so. Red or black is ideal, because this is going to be the enemy. But, do whatever you want. It's your game. You can give him a texture, too.

12.Now, select your Cube-guy with the Right Mouse Button. Go to the Logic Editor panel (F4) and press 'Add Property.' Name the property 'Cube.' Make sure you use a capital 'C.'

13.Select your bad-guy. Go to the Logic Editors (F4) and click Dynamic>>Actor. Good. Now both your guys are actors, ready to act in your game. Have fun, and I'll see you next time!

Blender Game Engine Tutorial: Part Two

Hi! It's me, Nate Nelson again. In my last BGE tutorial, we made a cube, gave it some texture, and rendered it. In this tutorial, we'll make a background for our guy.


1.Begin by making sure the 3D cursor is in the right place. The 3D cursor is a small, red-and-white striped circle that tells you where you mesh is going to appear. You can move it to where you want by clicking the Left Mouse Button, but right now, we need it in the center of the cube. If it isn't already, deselect the cube by pressing A. Then click the small pink circle in the middle of it with the Left Mouse Button. Press Numpad 1 to switch to front view. make sure that the 3D cursor is over the pink circle in all three directions: Numpad 7/ Z Axis, Numpad 1/Y Axis/ Numpad 3/ X axis. If it is, then you can move on with this tutorial.


2.Click "Add," in the top, left-hand corner of the screen, or hit Shift-A on the keyboard. Move your mouse to "Mesh," then "Plane." From top view, you will see the cube become unselected. Move down with your Numpad buttons, or the Middle Mouse Button. You will see a pink line through the center of you cube. This is the edge of your newly-created plane.


3.Switch back to top view with Numpad 7. Then press "S." Don't move your mouse, but press one, then zero. This will scale the plane ten times, to make the ground.


4.If you remember how to give things color from my last tutorial, then you'll know what to do to make the ground green. Of course, as I've said before, this is your Blender, your cube-guy. You can make the ground whatever color you want. But make sure you name the color, as I told you how to do last time.


5.God job so far. Now would be a good time to save your work. If you want this to be more modifications on your last document, then just save over. But if you want to do this in steps, then hit F2 on your keyboard. The Save As menu will appear. Save this under the same name as before, but put a '2' after it. This shows that this is differant from your last Blender document.


6.With your "ground" still selected, switch to Edit Mode by pressing the Tab key. With your mouse over the ground, press 'W.' Another menu will come up, on which you will select the option 'Subdivide Multi Fractal.' It will ask for a number of cuts. click the arrows to move it to '8.' Then it'll ask for a "Random Fac." A four would be good for this, but you can expiriment! When you're done, switch back to Object Mode with the Tab button.


NOTE: To undo something, press CTRL-Z. This goes with most Microsoft programs, but I just wanted you to know for sure.


7.You can render now, if you want. You can render any time, really. So. Now is the time to add another sun. Press Shift-A,>>Add>>Lamp>>Hemi. A Hemi Lamp should appear where ever the 3D cursor is. Now, with the Hemi Lamp selected, hold down Shift and click on your cube with the Right Mouse Button. Now, if evything went right, your cube is outlined in pink and your Hemi lamp is magenta. Hit CTRL-T, and select "Track to Constraint." Now the Hemi Lamp should follow your cube wherever it goes. Move him around with the Widges, just to test it out. And remember, if anything goes wrong, just post under this comment.


8.Now. Select the Camera, the pyramid wireframe object, then hold down Shift and select your cube-guy. (If you don't have a camera, and I don't see why you wouldn't, hit Shift-A>> Add>> Camera.) Hit CTRL-T on the keyboard, and, once again, click on "Track to Constraint." This will make the camera follow your guy wherever he goes.


NOTE: You can switch to Camera Mode with Numpad Zero, then press it again to switch back to 3D view.


9.Now, if you're not already there, switch to the Color Editor panel, but click on the picture of the earth, instead of the red sphere. Select 'Blend,' 'Paper,' and 'Real.' Then use the HoR, HoG, and HoB sliders to determine the colors of the horizon. I put my HoB slider to all, and the others to none. That made a beautiful dark blue horizon, but, like I've said, just do your own thing.


Now, if you'll render, you'll see that you have a fully-colored and textured cube-guy, a hilly ground, appropriate lighting, and a good-looking background. Save your work, close out Blender, and take a break. You've finished your second Nate Nelson BGE Tutorial. Nice Work!

Blender Game Engine Tutorial: Part One

Hi! I'm Nate Nelson, and I'm writing this tutorial for anyone who likes to animate or make video games. I am here to say that there is an amazing program called Blender that will assist you in either of the above.


This Tutorial is about BGE: Blender Game Engine. First, if you don't have Blender installed on your computer, go to http://www.blender.org/. From the home page, click "Version 2.49, Download Now." Go through the installation, and when you're finished, open Blender 2.49.


1.The Default screen has a gray background and a cube. You can use the Numpad or the middle mouse button to move around the view. MAKE SURE NUM LOCK IS SELECTED!!!!!!


NOTE: When you move around your view of the cube, you may notice that the perspective isn't very good. That's because you have the view set on 'User Ortho,' instead of 'User Persp.' Press the Numpad 5 key to change this.


2.Now. You can see that your cube is a dull shade of gray. To change this, go to the buttons in the upper, left-hand corner of the panel in the lower half of the screen, or just press F5.


3.Now you see that five more buttons have appeared. One with a light bulb, one with a red sphere, one with a square with brown spots on it, one with the toxic waste symbol, and one with the earth on it.


4.The light bulb button should be selected. Click on the red sphere instead. A new menu will pop up, with a big, gray sphere on the left side. Notice the three color pallets. The first should be gray, the second and third white. Select the first one. A color mixer will appear. You may make your cube any color that you wish.


5.Notice that under the Links and Pipeline header, there is a sub-header that says link to Object. under that is a pink strip with the word MA: MATERIAL on it. Click in it, and Material will disappear. Type in the name of the color i.e. Lime Green, Aqua Blue, Red-Orange, etc.


6. This next step is not necessary, but it gives your cube guy character. While still in the color panels, click on the symbol next to the red sphere: the square with brown spots. This will bring you to the texture panel. with the cube still selected, (having pink borders. If it isn't selected, do so with the Right Mouse Button) click under Texture Types. Go through the list and see which texture you want for your cube guy. I usually use Clouds, but you don't have to. Remember, this is you guy, do what you want with him.


7. Now that you've added, texture, let's see what he (or she) looks like. And don't freak; I know that you can't see the texture yet, but that's coming. If you look around the screen, you'll probably see a circle with lines around it. That is our sun. Select it, (Right Mouse Button) then use the Widges to drag it over the cube. The Widges are three arrows you might have seen. One is blue, pointing up, one is red, pointing sideways, and one is green, pointing forwards. These represent the X, Y, and Z axises. To activate the Widges in Blender 2.49, click the button near the middle of the header with the pointing hand on it. There are three types of Widges: Moving, Rotating, and Scaling. We'll get into this later. Right now, use the X and Y (Red and Green) Widges to move the "sun" over the Cube.


8.Great Job! To end Part One of my Game Engine Tutorial for Blender 2.49, press F12. That will show you your finished result, you rendering.


NOTE: If your texture does not appear in the rendered image, it's probably because you made your cube the same color as the texture, so it won't show up. Change the color of the cube if you really want a texture.


After you admire the image for a while, save your file with CTRL-S. When you're done, exit out of Blender and take a break. You have now finished your first Blender 2.49 tutorial! Congratulate yourself, and check back here soon for another BGE Tutorial!

Hi, y'all!!!

I'm Nate Nelson, writer and Blender geek. I made this blog so that I could share Blender tutorials and ideas with other young blog-friends. On my last blog, NATRON, I wrote four parts to a Blender Game Engine Tutorial, but unfortunatly, I seem to have lost my blog. So I'll copy my tutorials over from there to here so you can read them, too!

                                                                           Best regards-
                                                                                        Nate