
Hey, everybody! In the last part of this tutorial, we made a cup, gave it proper lighting, and made it see-through. In this part, we're going to work some more on that.
1.With your cup selected, Shift+D duplicate it, then hit enter to stop the grabbing motion. Then scale the duplicate down a bit so that none of it is outside of the original cup. Then go to the materials panel and click on the minus sign to get rid of the cup's material. Then click "New." Name your new material "FrappeBrown," and give it a brownish diffuse color. Then go to the Textures panel and click "New." Name your new texture "FrappeTex," and change the texture type from "Clouds" to "Noise." Then at the bottom of the textures panel, under "influence," select RGB to intensity, select "Normal," (the first box under the Geometry heading), then under the RGB to intensity button, make the color white. Render it. Your cup and frappe should look something like this:

2.With the cup selected, hit Shift+S, then from there, click on "Cursor to Selected." Then add a sphere. Then hit G>Z>4, then S>2.6. Then tab to edit mode, and select the bottom half of your sphere. Hit X, then click on "Faces." Then hit G>-Z>2. Then tab back to object mode. Click on "Smooth" in the shading panel. Then add a new material and name it "Whip." Add a new texture and name it "WhipTex." Change the TextureType from "Clouds" to "Wood." Then change the wood-type to "Band Noise." Then under the "Influence" heading, make the color brown, and select "Normal."
3.Go to sculpt mode. Use the grab tool to make the white lump on the top of your frappe look more like whipped cream (which it, in reality, is meant to be).
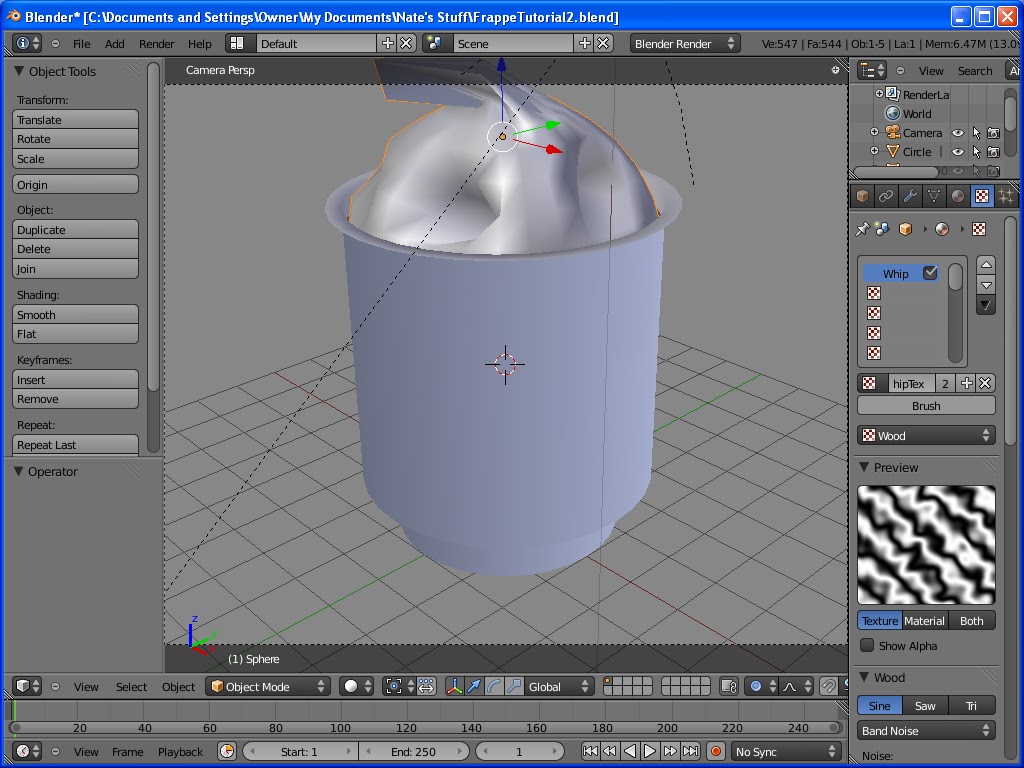 |
| Here's the result of my whipped cream sculpting |
5.Add a new material to the straw and name it "Straw," then add a new texture to the tube and name it "StrawTex." Make the TextureType a Blend, then under the "Colors" header, click on "Ramp." Select the right-most vertical line and change its location (the spinner under the ramp) to .496, and make the color red. Then select the left-most line and set its location to .223, and make it white. Put its alpha all the way up. Then click "Add," and change the location of the new line to .230, and make it white with its alpha all the way up. You should have a white background with a red line down the middle in the preview window.
6.Grab all the objects (including the lamp) in the 3D window, and hit G>-Z>4. Then save your work and render it. Congradulations, you have just made a frappe on Blender!
Hey, nice tutorial! Here's my result (I guess I did jump ahead a little, didn't I ;) http://3.bp.blogspot.com/_vfkyomEnc-E/TRYcyrR8DmI/AAAAAAAAAkU/cThg7lfkjN8/s1600/Frappuccino.png
ReplyDeleteAnyway, you might want to add a few more images to your tutorials. When people decide to read a text tutorial instead of watching a video, they're probably into the whole visual thing and would like to see more images. That's my experience at least, and it's just a suggestion :)
Yeah, yeah, yeah. I'm impressed. Now, how'd you do the choc. chips and choc. syrup?
ReplyDeleteThe little flakes (which I guess I could've put more work on) was just a particle system on the whipped cream using a colored plane object for the particles. The chocolate syrup was modeled by hand :D
ReplyDeleteI thought so! That's what I did for sprinkles the first time I tried to make a donut on Blender, before you wrote your tutorial! (BTW, I'll probably take your ocean tutorial sometime soon.)
ReplyDelete