Friday, December 31, 2010

Trophy!

In my previous post, mantioning the first annual Andrew Price Tutorial competition, I forgot to mention one thing: the prizes! So here they are...

1st (first) prize winner will recieve this awesome trophy:
And an (un) official Suzanne trading card.

2nd (second) prize winner will recieve a silver trophy and the Suzanne card.

3rd (third) prize winner will recieve a bronze trophy and the Suzanne card.

Wednesday, December 29, 2010

The First APT Competition! December 29-January 7

Before I reveal what "APT" means, here's a tacky intro:


          His name is a legend...
                                                    ...among Blender geeks...


...His tutorials are known across the globe...
                                               ...he is known as the Blender Guru...


                               He is...

Andrew Price.
     Andrew Price's Blender tutorials are known around the Blender Community as being very instructive and fun, and he has spoken at the annual Blender confrence. He writes tutorials and gives out free downloads at http://www.blenderguru.com/.

     So I decided to host an annual Andrew Price tutorial competition. you must build a scene in Blender using only things that you learnded from an Andrew Price tutorial. Here are the official rules:

1.You are only allowed to use things that you learned in an Andrew Price tutorial. You may look for tutorials while making your scene and read them. There is no limit to the amount of tutorials you can use. However, you may not use the starter files that Andrew sometimes gives out before his tutorials.

2.You may use any version of Blender that you like, even if it's not the one the tutorials are about.

3.You may make your scene a still image, an animation, or a game. You will then post the link on this blog. Everyone who follows this blog may participate. I will then put a poll with everyone's names on it who entered, and everyone can vote for who made the best scene.You may not vote for yourself.

                                                                That is all. Carry on.

Saturday, December 25, 2010

Hey, everyone! I just got a minute card for Pxmas, so I can talk to you whenever I have my phone! Aren't you soooo happy?

Wednesday, December 22, 2010

How to Make a Delicious Frappe in Blender 2.5: Part two

Hey, everybody! In the last part of this tutorial, we made a cup, gave it proper lighting, and made it see-through. In this part, we're going to work some more on that.

1.With your cup selected, Shift+D duplicate it, then hit enter to stop the grabbing motion. Then scale the duplicate down a bit so that none of it is outside of the original cup. Then go to the materials panel and click on the minus sign to get rid of the cup's material. Then click "New." Name your new material "FrappeBrown," and give it a brownish diffuse color. Then go to the Textures panel and click "New." Name your new texture "FrappeTex," and change the texture type from "Clouds" to "Noise." Then at the bottom of the textures panel, under "influence," select RGB to intensity, select "Normal," (the first box under the Geometry heading), then under the RGB to intensity button, make the color white. Render it. Your cup and frappe should look something like this:

2.With the cup selected, hit Shift+S, then from there, click on "Cursor to Selected." Then add a sphere. Then hit G>Z>4, then S>2.6. Then tab to edit mode, and select the bottom half of your sphere. Hit X, then click on "Faces." Then hit G>-Z>2. Then tab back to object mode. Click on "Smooth" in the shading panel. Then add a new material and name it "Whip." Add a new texture and name it "WhipTex." Change the TextureType from "Clouds" to "Wood." Then change the wood-type to "Band Noise." Then under the "Influence" heading, make the color brown, and select "Normal."

3.Go to sculpt mode. Use the grab tool to make the white lump on the top of your frappe look more like whipped cream (which it, in reality, is meant to be).

Here's the result of my whipped cream sculpting
4.With the 3D cursor still at the center of your cup, add a tube. De-select the "Cap ends" option in the "add tube" panel at the left side of the screen. Go into wireframe mode (Z) and scale it down a bit. Then tab to edit mode and de-select everything. Select all the topmost vertices, then hit E>Z>5. (Again, if your extrusion is already locked on the Z axis, don't press Z after the E.) Then hit G>-Z>3. Tab to object mode and rotate and translate it so that it's sticking out of the cup and through the whipped cream at an angle.

5.Add a new material to the straw and name it "Straw," then add a new texture to the tube and name it "StrawTex." Make the TextureType a Blend, then under the "Colors" header, click on "Ramp." Select the right-most vertical line and change its location (the spinner under the ramp) to .496, and make the color red. Then select the left-most line and set its location to .223, and make it white. Put its alpha all the way up. Then click "Add," and change the location of the new line to .230, and make it white with its alpha all the way up. You should have a white background with a red line down the middle in the preview window.

6.Grab all the objects (including the lamp) in the 3D window, and hit G>-Z>4. Then save your work and render it. Congradulations, you have just made a frappe on Blender!

Donnel House

Hey, everyone! I just spent the last week helping out my dad (who is James L. Nelson) decorate and un-decorate the Donnel House, a Victorian mansion, property of the Maine Maritime Museum. (Since you already know who my dad is, why not give away my age, too?) Anyways, it looked pretty cool, and my sister looked pretty good dressed up like Addie Donnel, who is still in the house, even though she's been dead for decades.

Tuesday, December 21, 2010

How to Make a Delicious Soft Drink in Blender 2.5: Part One

Sorry, Hester, but there was something wrong with Blender 2.4 on my computer, so I can't do the tree tutorial quite yet. But in the meantime, here's a 2.5 tutorial.

The final render result of this tutorial
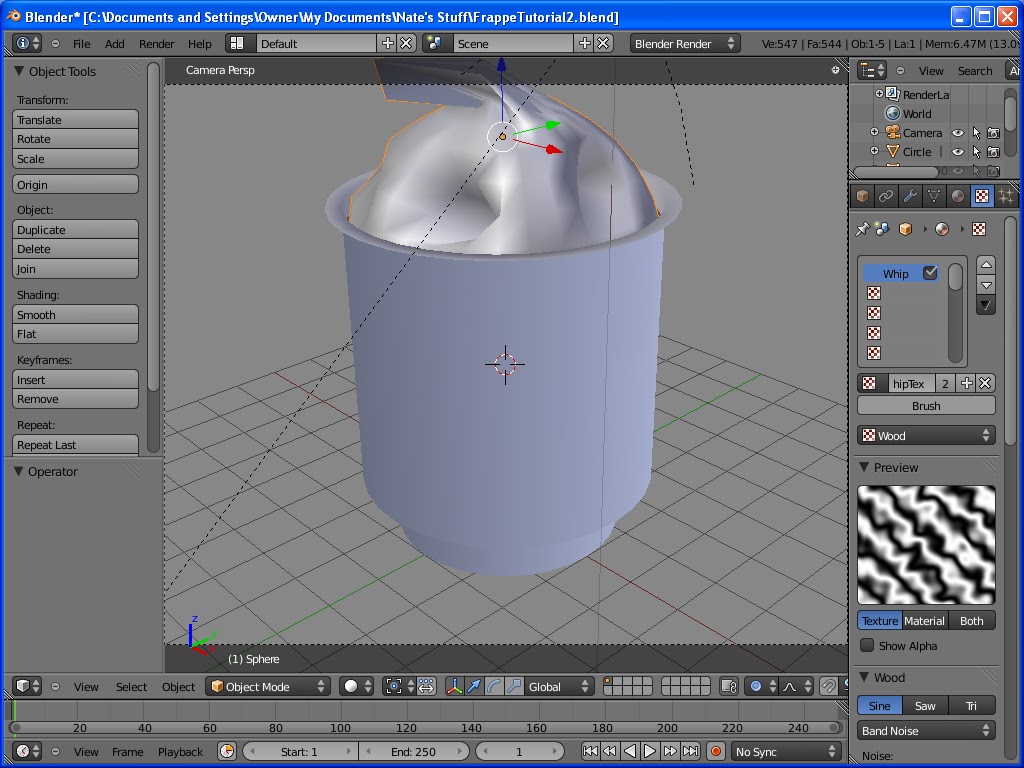
1.Start with the default screen of Blender 2.5. Delete the default cube and add a circle. Click on "fill" in the "add circle" panel on the left. Then tab to edit mode, and extrude the circle (E>1). Then tab back to object mode and scale it (S>X>shift+Z>2). Then go back to edit mode. All the topmost vertices will probably be selected. If they're not, de-select everything and select them. Then hit E>S>X>shift+Z>1.3. Then hit E>5. When you hit E, your extrusion should already be locked onto the Z axis. If it is, you should see a blue line through your mesh. If it isn't, then you won't see anything. In that case, press Z after you press E. With the topmost vertices still selected, press X or Delete, then choose "faces" from the menu that pops up. Then select the topmost vertices and hit E>S>1.1.

2.Back in object mode, click on "smooth" in the sading panel. Then go to the checkerboard circle (the materials panel) and... wait! If I were anyone else, I'd tell you to add a new material. But don't. If you click on the checkerboard circle (browse ID data), you'll see that Blender comes with a material named "material" by default. I'm big on not having extra materials and textures, so select the default material. And if there isn't one, add one. Name it "CupTransp." Go down and select the box next to the word "tranparency." Then open that panel, and change the type of transparancy to RayTrace. Turn the fresnel up to "2.5."

3.Then go to the Textures panel and click on the Browse ID Data button (the checkerboard square) and click on "Tex." If there isn't a default texture already, add a new one. Name your texture "CupTex." Change the texture type to "Blend." Then change the Blend to "Diagonal." Then scroll down and change the color of the texture from pink to gray.

4.Next, select the default lamp and hit G>-Y>3, then G>Z>4. Then go to the lamp panels and change it to a hemi, and give it a slightly yellow color. Change the energy level up to 1.450. Now for rigging the camera. Select your cup, then tab to edit mode. Now, this step has to be done in edit mode. Select all the vertices with either Ctrl+L or A. Then hit G>-Z>3. Then tab back to object mode and do the same agian, but on the positive-Z axis. That has just moved the object center (the orange dot) to the actual center of the cup. Slect the camera, the Shift+select the cup. Hit Ctrl+T, then click on "Damped track to constraint." Then go to top view and select only the camera, then hit G>X>5, and G>-Y>5. Then G>Z>6. Then render your cup with F12.
The result should look something like this.

Thursday, December 16, 2010

Ben...

Here are my failed renders from your donut tutorial:

This is the one that turned out like a powdered donut....


And here's the one the turned out kind of okay. But the problem is that the material somehow is sideways instead of right-side-up. Maybe I'll try the tutorial again and pay more attention.

Wednesday, December 15, 2010

Hey!

Any of you want to hear an incredibly lame tutorial? Great. Just give me something to write one on.

Wednesday, December 1, 2010

Hey!

Have any of you ever heard of famous maritime author James L. Nelson? Just wondering. 'Cause his historical nonfiction is awesome, and his historical fiction is even better. Some of his books include The Guardship, The Blackbirder, and The Pirate Round. Just thought you might want to check it out. That is, if you like history.